Warung Bebas
Showing posts with label Tuesday tips. Show all posts

Tuesday, October 1, 2013

Crazy Beauty Tip: Eat More Ice Cream

Sooo, I've struggled with gross, brittle, flaky nails for most of my adult life. Hiding the issue with nail polish is all well and good, but if anything it only dehydrates nails more. It's a vicious cycle.

The strangest thing has happened lately. Despite no changes to my lifestyle, my nails have actually been growing in the past few months. Long, strong, and finally not so brittle I'm terrified to open a canned drink without losing one. 

In unrelated news (or so I thought) I'd been beating myself up over an addiction I picked up over summer and still haven't quit... The constant offers on yummy ice creams in Sainsbury's! (Not a sponsored post...)


Yep, irresistible deals like this one on orgasmic snacks like the ridiculously named yet oh-so-tasty 'Crunchie Blast Sticks' have led to ice cream being my nightly sofa snack of choice. 

I've just had an epiphany that I think THIS is the reason my nails are so strong. My bod is getting a frequent calcium dose from the dairy in the ice cream! I hate milk and cream, so don't really get calcium elsewhere, so I'm figuring this is the answer. 

Here, check out this leopard design I painted on my non-stubby naked nails! 

'Step by step tutorial: 1. Eat shit loads of ice cream, 2. Paint nails'

Moral of the story? Eff anyone that looks down on you for pigging out on reduced ice cream every night without fail. Your nails are WAY better than theirs. #win

xo

Tuesday, October 30, 2012

Tuesday Tips: Halloween DIY Ideas!

EEK! It's Halloween tomorrow! Have you guys got fun plans? I'm working then going for dinner straight after but think I'm going to do a more subtle version of my below video tutorial from last year for that 'casually dead' look... 


Here's a bunch of other cool DIY Halloween Ideas from the blogosphere...

Katie from Katie's Beauty Blog did this amazing skull tutorial for Company Magazine - check it out on her blog or in this month's Company, obvz!


More skulls, this time in the form of Ella Masters' pretty mexican skull nails! She's done a fab tutorial over on her blog if all out Halloween make up ain't your bag...


Dexter inspired bloody cupcakes, anyone? Created by Sarah from A Million Dresses


Pimp your pumpkin the classy way... Who needs knives when you have rhinestones? 


Lily Pebbles and Gem from Gem's Maquillage did a frankly AWESOME tutorial for their corpse bride look! 


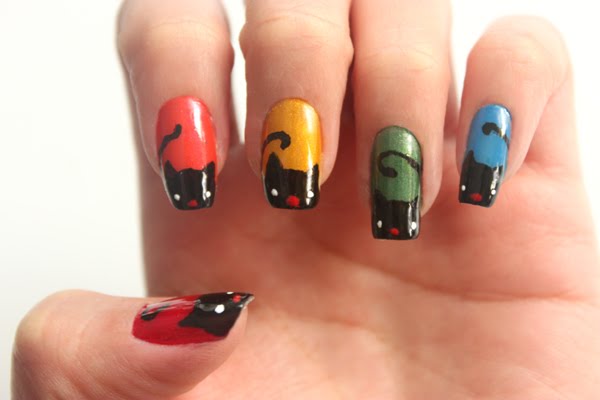
Any excuse for cat nail art! Black cats are totes Halloweeny right?


I love how Kavita went ALL OUT with her skeleton look. Halloween is about looking creepy/scary/gross, not slutty (although I am seemingly the only girl in Canterbury with this opinion...)


More cupcake creepy/cuteness from Zoe from The London Lipgloss! Aww :)


Hope you've gotten a bit of inspiration from my little roundup post, and if you already celebrated at the weekend - SORRY for being fashionably late - bookmark it for next year ;)

xo

Tuesday, May 1, 2012

DIY House of Holland Inspired Bleach Jeans

* Thanks so much for all of the wonderful comments and tweets about my latest post concerning my new job! xxx *

I love the bleachy effect used in the latest House of Holland collection! If there's one designer brand I would be tempted to splurge on one day, it probably would be House of Holland, but for the time being, the best I can do is DIY my way to the designer look! Well, you know how I get with bleach. 


You will need

 Jeans, bog bleach, paintbrush, washing machine! 


Get some jeans - mine were these ones c/o Republic! Lay the jeans out on a safe working surface. Tiled floors (or a garden table, in my case) work well! Bung some bleach in a mug, use a chunky paintbrush to pain the bleach on erratically! 


Wait...


Wait some more - until the bleached bits are all fully white!


Wash in the machine and then wear those babies! I went a bit overboard with my bleach, but it was so fun I couldn't help it! 


(heels - old Topshop, blouse - H&M, headscarf - charity shop)

What do you think of my latest DIY effort? 

Tuesday, April 17, 2012

Tuesday Tip: DIY chalk hair colour!

I saw this fabulous idea over at The Beauty Department, a totally incredible blog that puts my limp attempts at creativity to shame! Appaz by using soft chalk pastels on damp hair  and then using a straightener to seal in the colour, you can create temporary dip dye and streaks! Full instructions over at The Beauty Department


(images from The Beauty Department)

My hair is not made for this tutorial as it is short and black, but I thought I'd have a stab at it anyway to see how it turned out! I looked for pastels in WH Smith but they were like £8, so I flounced off to The Works and got some for £3.99. It took a few tries to get the the hang of it, by which time my hair was a frizzy dry mess from all the straightening and brushing... so by the time I had got the hang of the technique, it did just look as if I had chalk in my hair. Not dye. 

During:


After:

I think this would work perfectly well on those with lighter hair, but I don't think it's impossible to get the look on black hair. In the future, I will do it on clean hair, get it right first time now I know how to do it, and consider buying more posh and pigmented chalks (I think art stores sell them individually, so no need for a pricey WH Smith bulk buy). 

What do you think of this idea? If you've tried it, do you have any tips or techniques to share? 


Tuesday, April 10, 2012

Tuesday Tip: DIY Daisy Nail Art!

I've been super inspired by daisy prints since acquiring my fabulous Republic jeans and seeing the abundance of daisy prints at the Motel blogger event the other day! And what do we do when we love a trend but for hygiene reasons can't wear the same item of clothing every single day? All together now: Make it nail art! 


My manicure of the moment is so perfect for Spring and has received loads of comments from people thinking they're nail stickers! Nope, this is all real! It's a really simple look to create and hopefully you'll get the gist from my little graphic, but if not, here's how to get the look:


Start with a base colour - I used blue to match my Republic daisy jeans!

 Using yellow nail polish, dot a few dots on the nail, leaving enough space between each for the petals
✿ Using white nail polish, dot around the yellow spots to create petals
 Yellow polish is usually a bit thin, so once you’ve done the petals, go back and do another blob of yellow in the middle
 Finish with a slick of topcoat to seal the design in and make it look like one smooth layer (you can see how bumpy it looks without a topcoat in the bottom-right picture above!)

What do you think of the daisy nail look? 
xo


PS - I did the little daisy icons in the text above using CopyPasteCharacter! Amazing text graphics you can paste into text to jazz up blog posts and tweets!

Tuesday, March 13, 2012

DIY Pocket Patch Shorts

'Sup! 

So, you know the amazing cat pocket shorts from Saturday's post? Yeah, I couldn't wait to try out making my own. I didn't have any cat material but made do with a very pretty floral pillowcase I bought in charity shop! Charity shop pillowcases are my go-to when I need cheap and pretty material in small quantities - sod off C&H with your £5 'fat quarters'! 

In what is quite possibly a first on this blog, this does require moderate sewing. But, as you'll see in my tutorial, I have gone out of my way to do as little sewing as possible! You could even do this project using fabric glue, but I personally like that you can unpick the stitching and sew on different material if you fancy. 

So, here are the before shots - shorts courtesy of Republic as I am currently blogging for them! And you can find the link to a short video tutorial over on Republic's Wear It Your Way blog, if it sounds like gobbledegook in the tutorial below. 


And here's my tutorial:

Ta-daaaa!


I love them! What do you think? 

It was a tad more time consuming than the other DIY's I usually undertake, but I guess there are some things that need a bit more effort. It took about an hour all in all, but I did keep getting distracted by Cheaper By The Dozen! What a film. 

Hope you've enjoyed my latest DIY!

xxx

Tuesday, February 28, 2012

Tuesday Tip: Shoelace Styling

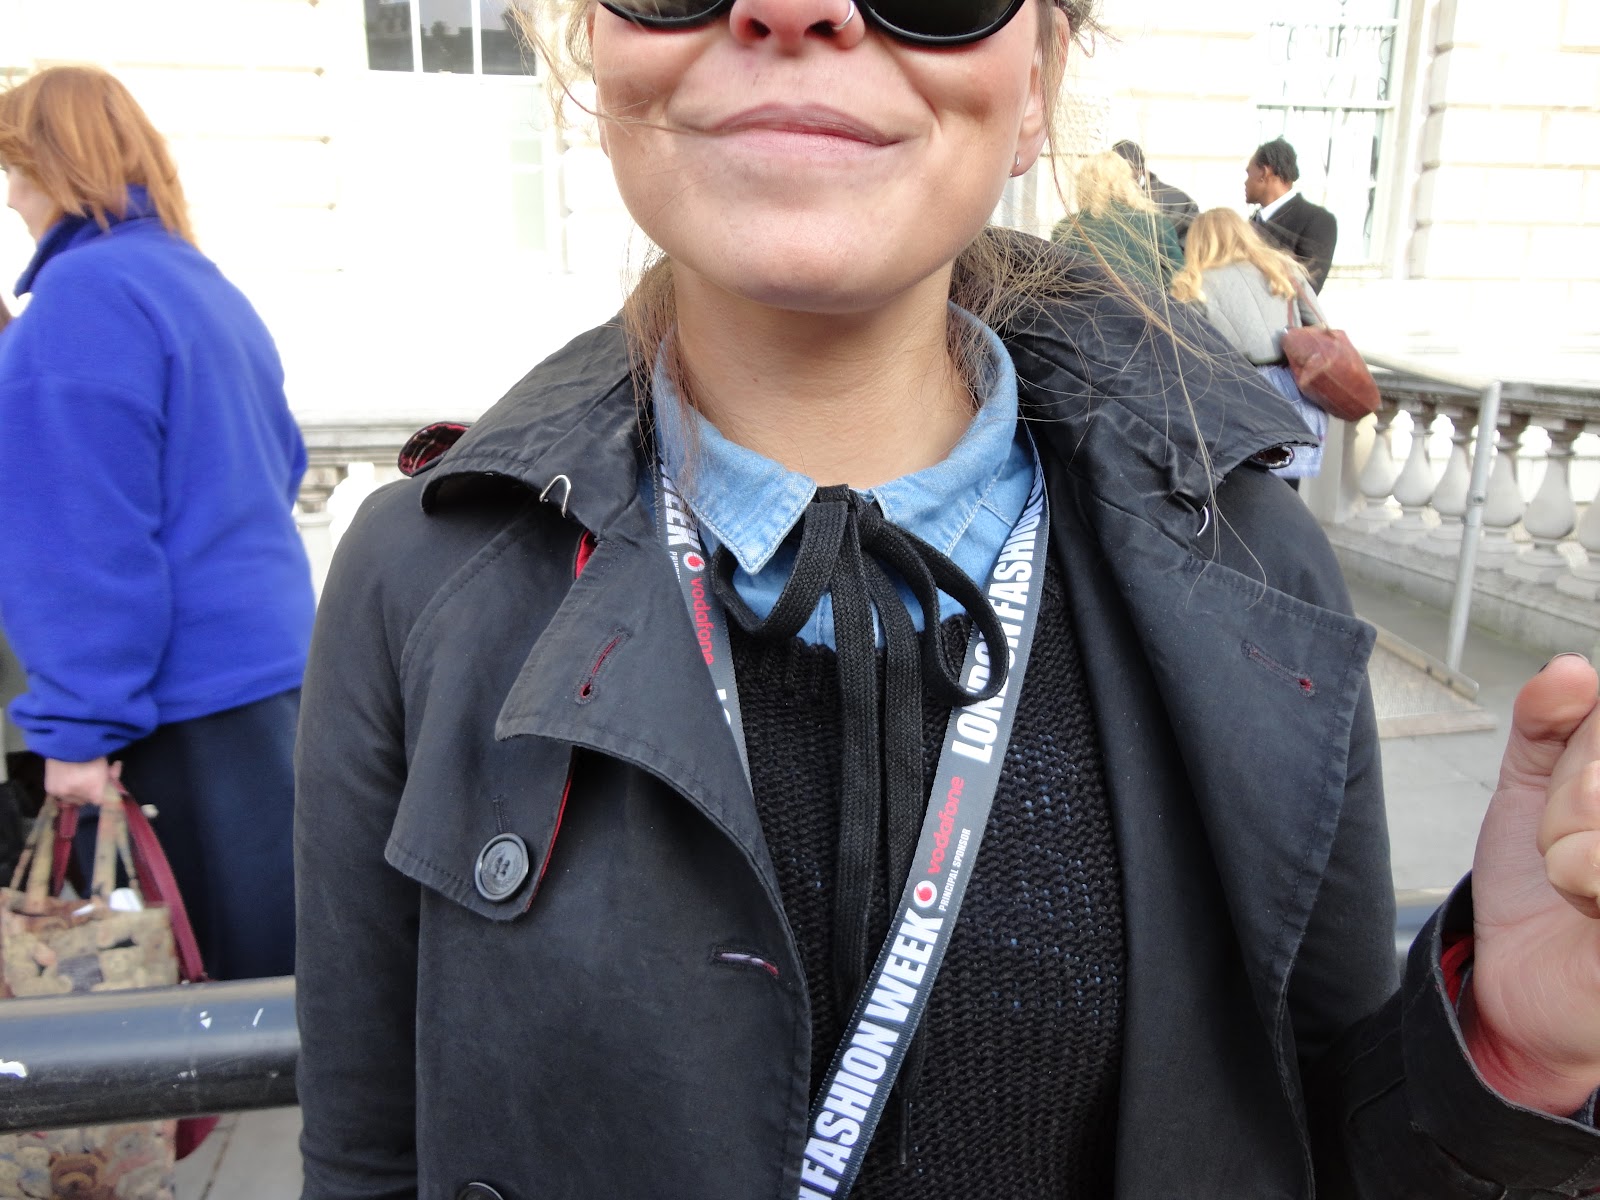
Here's a quick and easy styling tip I snapped at London Fashion Week! Tying a neck bow with a shoe lace instead of ribbon! Sometimes I think ribbon bows are a bit too dressy, so this is perfect for giving a blouse a bit of cuteness and edginess all at the same time.


Don't you think that's just the coolest styling touch? I love little details like that!

Also, LOVING denim shirts at the moment, they seem to be everywhere! I just bought a short sleeved one in a charity shop so will snap it and share it on here ASAP. I'm actually awaiting the arrival of my brand new camera today... £350 of spontaneity right there... Probably letting the scrimping side down a bit there, but there are some things you need to invest in and after a lot of missed photo opportunities at LFW, I've realised the time to invest in a Canon (the best camera brand, appaz) is NOW! 

Tuesday, February 7, 2012

Valentines Bits To Buy & DIY

Evening one and all, and welcome to my bumper Valentines post! 

This first section is a bit of an alternative gift guide. There's no real structure: there's crazy stuff, cute stuff, guy stuff and girl stuff. Who says valentines gifts need to be a lovey dovey heart fest? Hopefully you'll find something a bit different to buy your beau or something to ask them to buy you! Failing that, maybe you'll have some laughs at my finds...


♥ Bookrest lamp, £37.95, ClickShop (I would love to get this for Alex!)
♥ His 'n' Hers Tongue Scrapers, £6 Urban Outfitters (EW! My friend Jen would totally dig these, though.)
♥ My Side, Your Side Pillowcases, £26.75, Not On The High Street
♥ Pick Master, £19.75, ClickShop (How cool is this?! It turns anything into a plectrum!)
♥ Pug Egg Cup, £8.50, Maiden (Just Aww.)
♥ Cat Egg Cup, £10.95, Liberty (    "      "   )
♥ Tea Infuser, £14, Urban Outfitters  
♥ Mug, £17.50, Sweet William Designs @ Not On The Hight Street
♥ Love Beanstalk Pod, £12.49, I Want One Of Those (This is insane. It's a plant which grows with a love message imprinted in the leaves! Watch the vid via the link if you want to find out more!)
♥ Gemma Correll Card, £2.50, Soma Gallery
♥ Anatomical Heart Jelly Mould, £6.99, I Want One Of Those (SO flipping cool!)
♥ Kissing Disease Plushie, £6.95, GIANTmicrobes (Who knew germs could be so cute? Loads of awesome plushies on the website, a must-see!)
♥ 7/10 Card, £2.75, Lazy Oaf
♥ Bee My Honey Balm, £4, Paperchase


I've been bookmarking various DIY projects for a while to share with you all as I think handmade Valentines gifts can be a lot more meaningful, and let's face it, cheap! 

The first one is my own project, although I haven't shown the exact design I shall be giving to Alex as I know he won't be able to go a week without stalking the blog and spoiling the surprise! 

So, I have been making magnetic bookmarks! They are a handy alternative to ordinary bookmarks as they don't fall out. You can also line it up along the side of the book so you can remember what line you were on! I got the idea from some children's bookmarks I saw in WH Smith and thought I'd give it a go...


The pretty lady graphic is from Eat Drink Chic, and is shown further down this post in its original context! I changed it a bit to make it into a foldable bookmark, and made my first ever PDF printable if you'd like to make use any of the above designs yourself. Just click here to open it, and for instructions on how to make your own Dymo label designs! 

To start out, I printed my designs on card. Mine was 240gsm, but I think thicker would be ideal! 


After folding the designs in half, I stuck on 2 pieces of magnetic tape on either end of the reverse of the bookmark, so they match up and close neatly. Done! (My tape cost £1.25 on eBay, but you'll want to try and request express delivery if poss!)


Here are some other amazing ideas from around the web (click the links to find the full tutorials):

Filling a pill box with little treats and love notes! Aww! Kinnnnda late for it now, but if you get your skates on, maybe your loved one can eat a few days in a row! ;) 


Eat Drink Chic created these amazing printable bits and bobs for a Valentines Couch Picnic Date! I love the little 'Admit One' tickets!


This Origami heart bookmark looks a bit fiddly but the end result is so cute!


These Coffee Cup Wrappers are from Eat Drink Chic. I don't have coffee cups (MUST get some!) so I can't really use this one but it's too adorable not to share.


They also turned the design into a little card and envelope:


Adorable printable giftwrap (the doggy one is my fave!):


This printable lunch bag is really sweet, and the design could be printed onto anything, really. A card or gift bag for example!


Find these cute ladies and loads of lovely printables here


This croc is on the above link, too! Sounds a bit fiddly for me, but looks so cool! You can put sweets in his body! 


A great roundup of retro valentines printables on Heart Handmade

I can't get over how cool this scratch card idea is! I found another technique for making scratch cards here, too. So fun! 


I think these handmade chocolate wrappers are a cute idea. Don't think my boyfriend would appreciate the girly factor, but you could do something cool with it like use a map or comic strip or Playboy depending on your beau's interests! ;) 


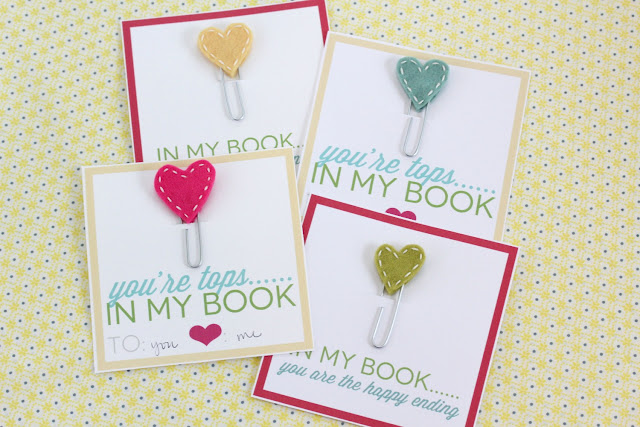
Yes, it's another bookmark tutorial (can you tell my boyfriend is a huge bookworm?), but this one is built in with the valentines card! Two birds, one stone.


These felt Fortune Cookies  are a super cute way to show you care! Maybe a fun alternative to valentines vouchers? (ie. 'This entitles you to 10 minutes of back-scratching, moan-free!) There is a crochet version of this on Youtube for those who can! 


And I'm spent! 

I think this is the longest I've ever spent on a post, so I hope you've found some inspiration here! Do you have any cool ideas of your own to share? Spill! 


gem and jam Copyright © 2014 Fast Money -- Powered by Blogger