This week's tip is a recipe for the delicious birthday cake I made our friend William the other day! His mum described it as 'beautiful', and what she says goes!
This recipe is the simplest sponge recipe ever, and has been served up on every birthday me and my
siblings have ever had, in various multi-coloured incarnations! This version is a bit boring as I only have blue and pink food colouring, and the cake is for a boy! But there is potential to create a masterpiece! This recipe also works perfectly for cupcakes.
You will need:

3 x medium eggs
self-raising flour
butter
caster sugar
1 tsp baking powder
food colouring
icing sugar
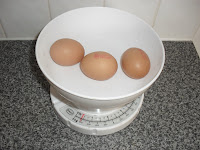
♥ Weigh the 3 eggs. Then measure out the same weight in butter, flour and sugar.


♥ Cream the butter and sugar together until light and fluffy. If you're doing this by hand, stop when the sugar stops feeling crunchy as you mix it. Technical terminology here, folks!
♥ Add the eggs, one at a time. Beat the mixture very quickly after you add each egg to prevent it curdling.
♥ Sieve the flour and baking powder into the mixture gradually, folding it in with a metal spoon to let air in (to help it rise).


♥ Divide the mixture into 2 separate bowls, and add whatever colour food dye you want the sponge to be a combination of! Add the food colouring carefully. If the mixture goes a bit runny, stick a bit more flour in.
♥ Grease your baking tins, and stick blobs of each colour mixture into the tins. Swirl it about a bit and pop in the oven at 180c.


♥ Don't check on the cake for at least 20 minutes. If you open the oven before then, your cake will quite literally be a flop! 25 mins is usually enough time for the centre of the cake to spring back when you touch it. If you press the cake and it stays pressed, give it a little longer! Hope this makes sense!
♥ Whilst you're waiting, mix up your icing sugar. I just mix up a few tbsps of butter until soft and add heaps of icing sugar (sieved) until I think I have enough!


♥ Separate your icing sugar into bowls and add food colouring according to how you'd like to decorate the cake!
♥ Remove cake tins from oven and carefully up-end the cakes onto cooling racks or plates. Sometimes a bit of cake might stick to the tins a bit, but just scrape it out and stick it back in the gap (see below!) It'll be sandwiched together with icing, so it doesn't matter!

♥ Once cool, ice the cake however you like! I went with a mint green topping and filling, with an injoke written (with piping bag, £1.30 ish in Wilkinsons) in turquoise and red. I won't confuse you by posting the FINAL product!


♥ And here's how the swirly pattern looks inside. Imagine if it was mint green and pastel purple or something. Gorgeous!

Happy Tuesday, everybody!
♥


